Upgrading the intake manifold on a 6.4L Gen 3 HEMI Challenger is one of those modifications that can either significantly improve performance or hurt it, depending on how and when it’s done.
This intake manifold install guide walks through the correct installation process while also explaining where the gains come from, how to avoid vacuum leaks, and why this upgrade needs to be matched to your setup.
Why Upgrade the Intake Manifold on a 6.4L HEMI?
The factory 6.4L intake manifold is designed for strong low – and mid – range torque. It performs well in stock applications, especially for street-driven vehicles.
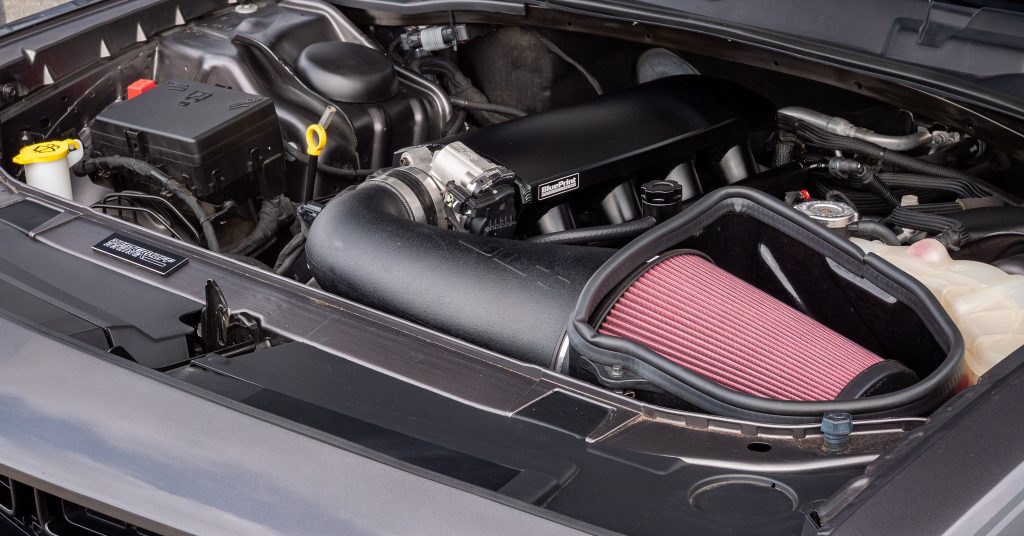
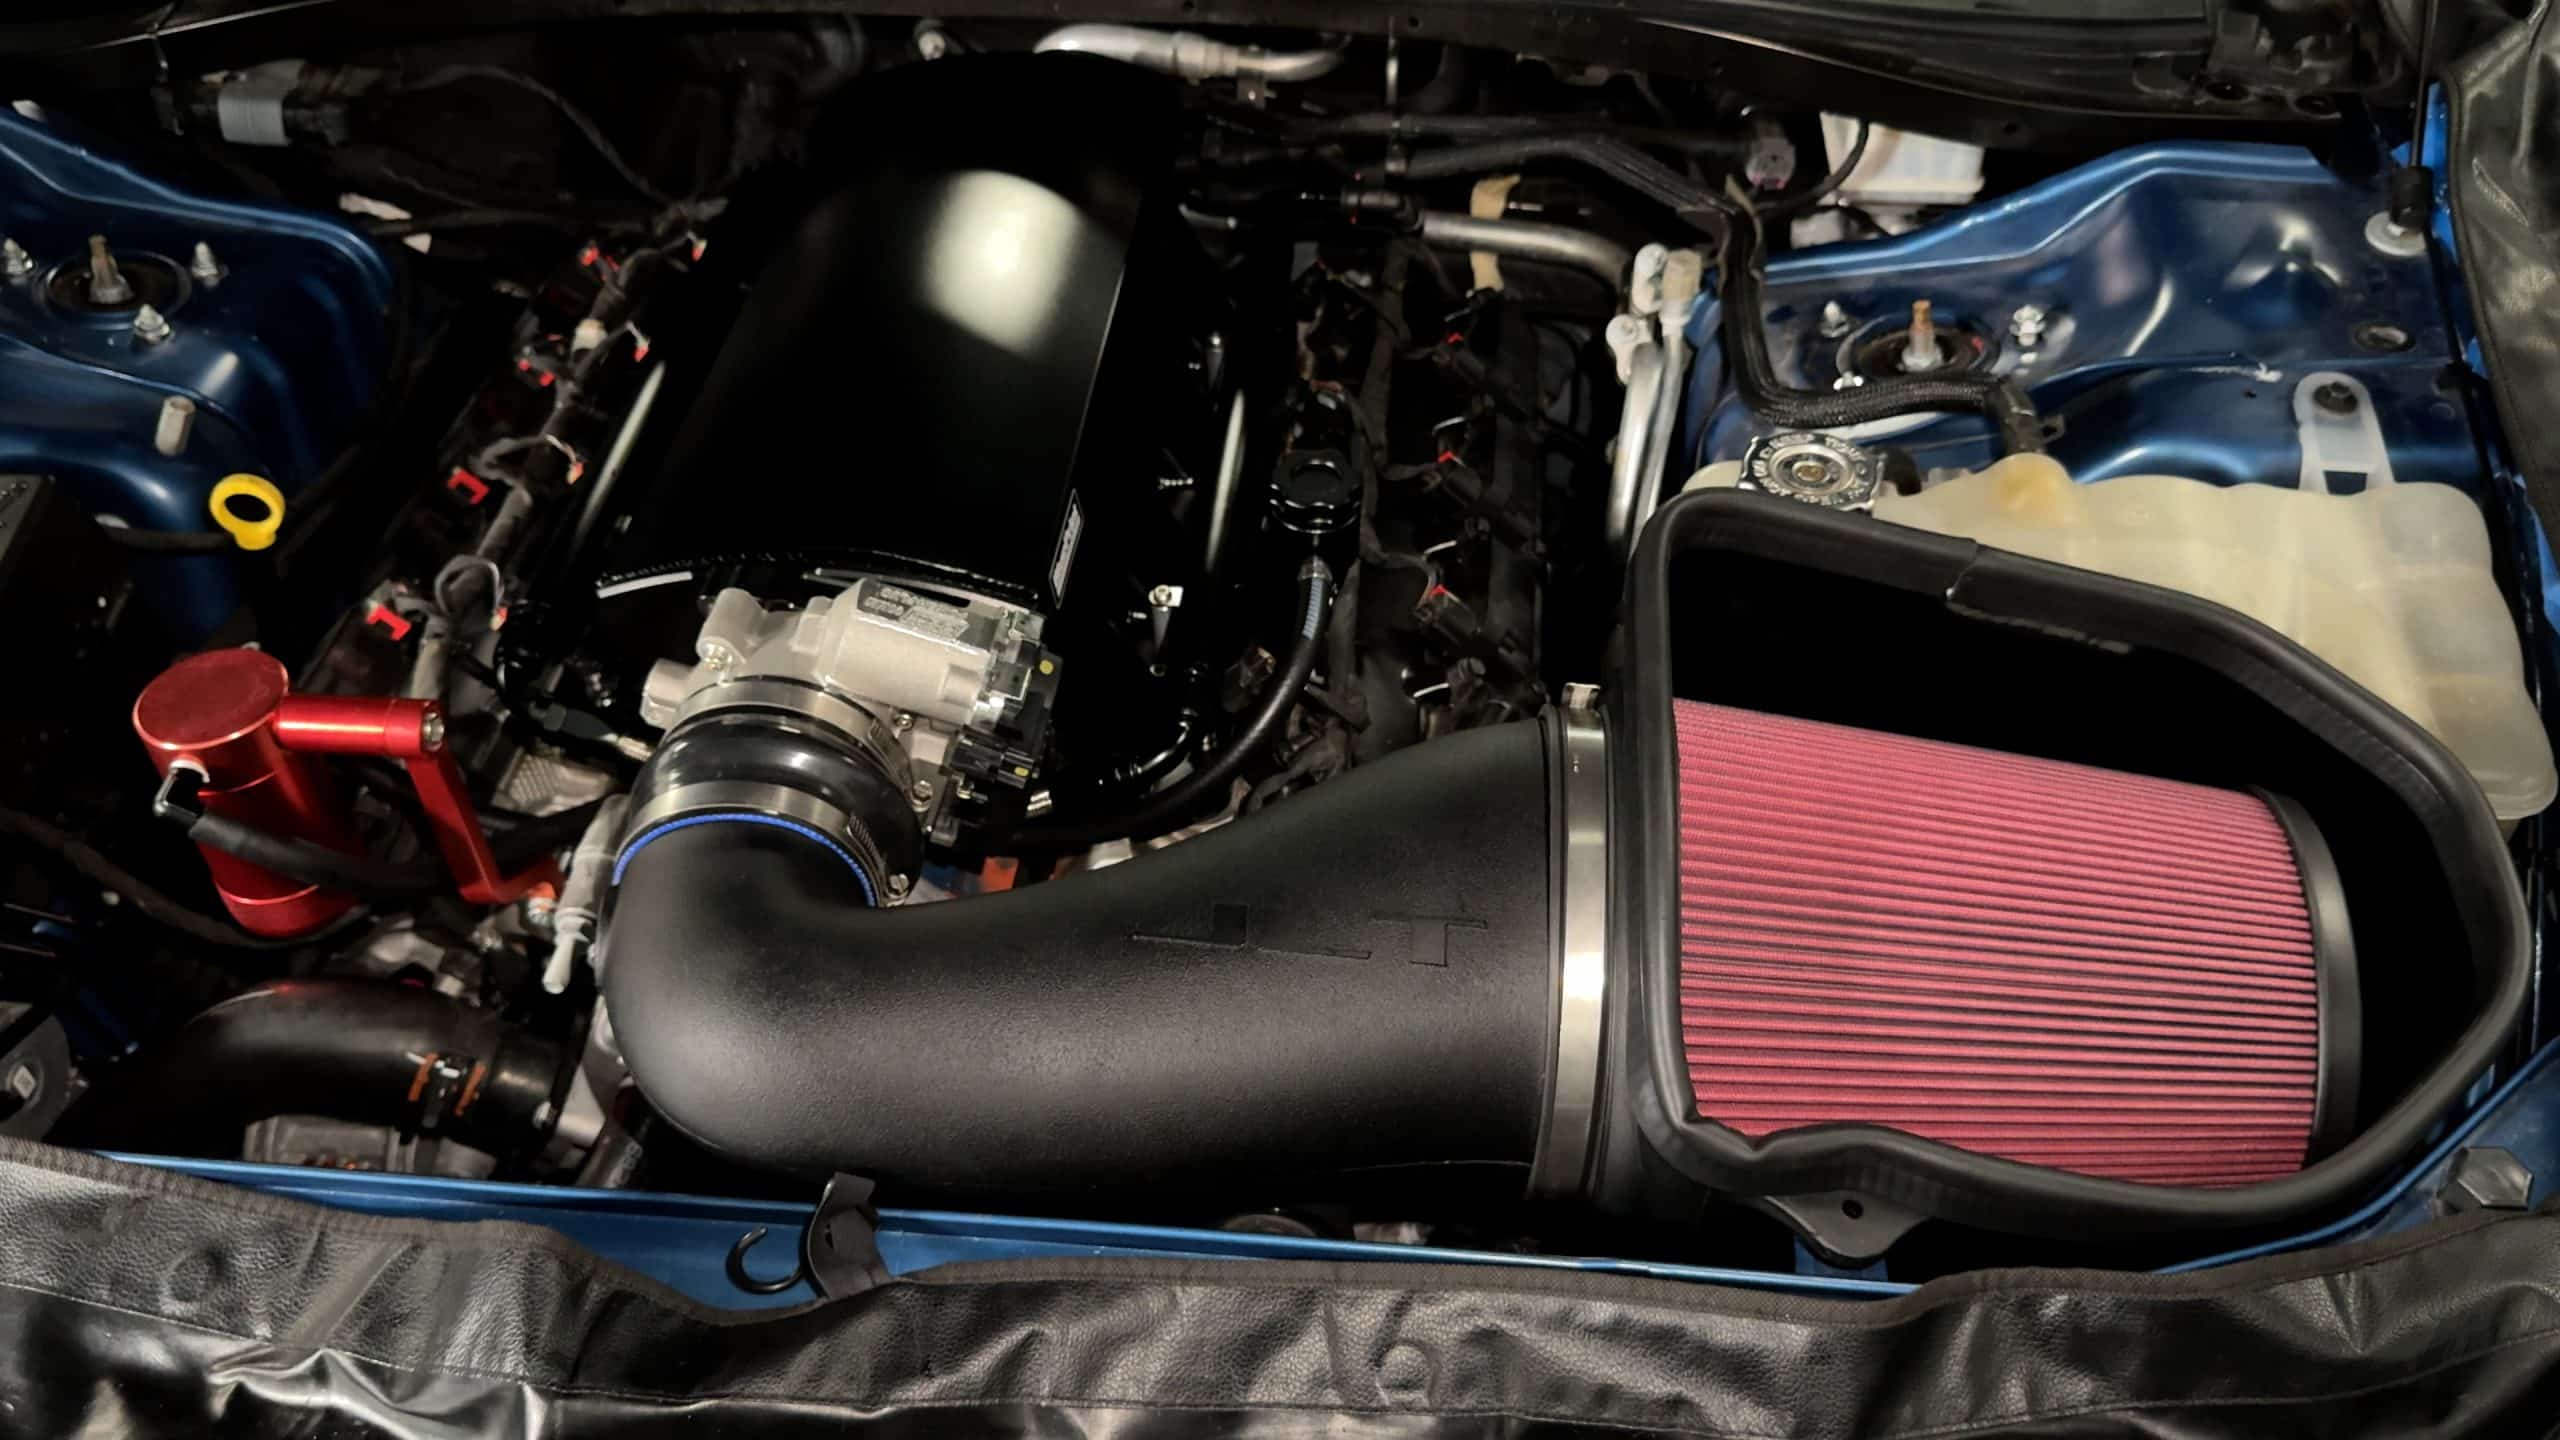
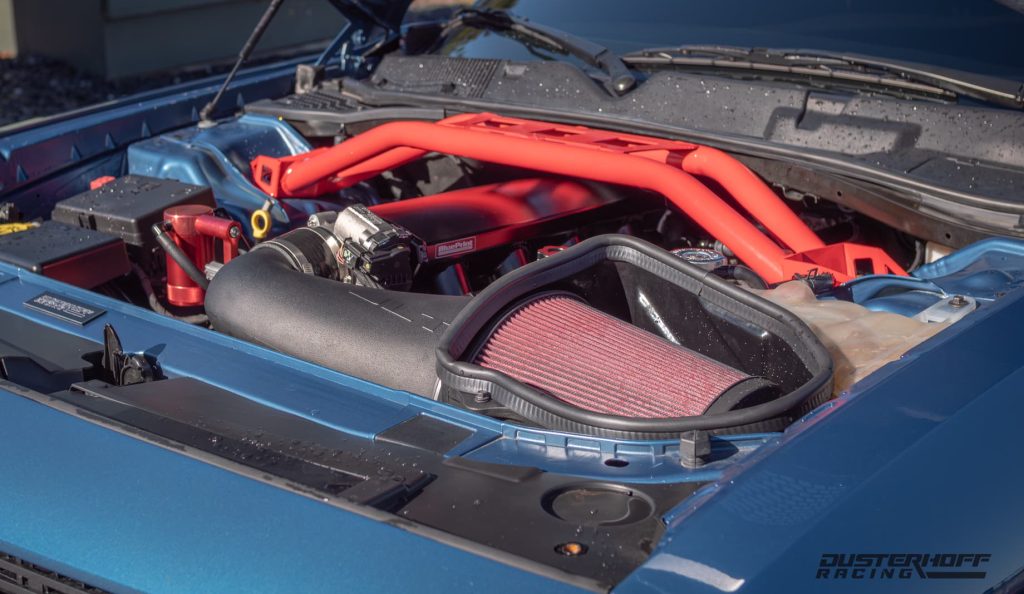
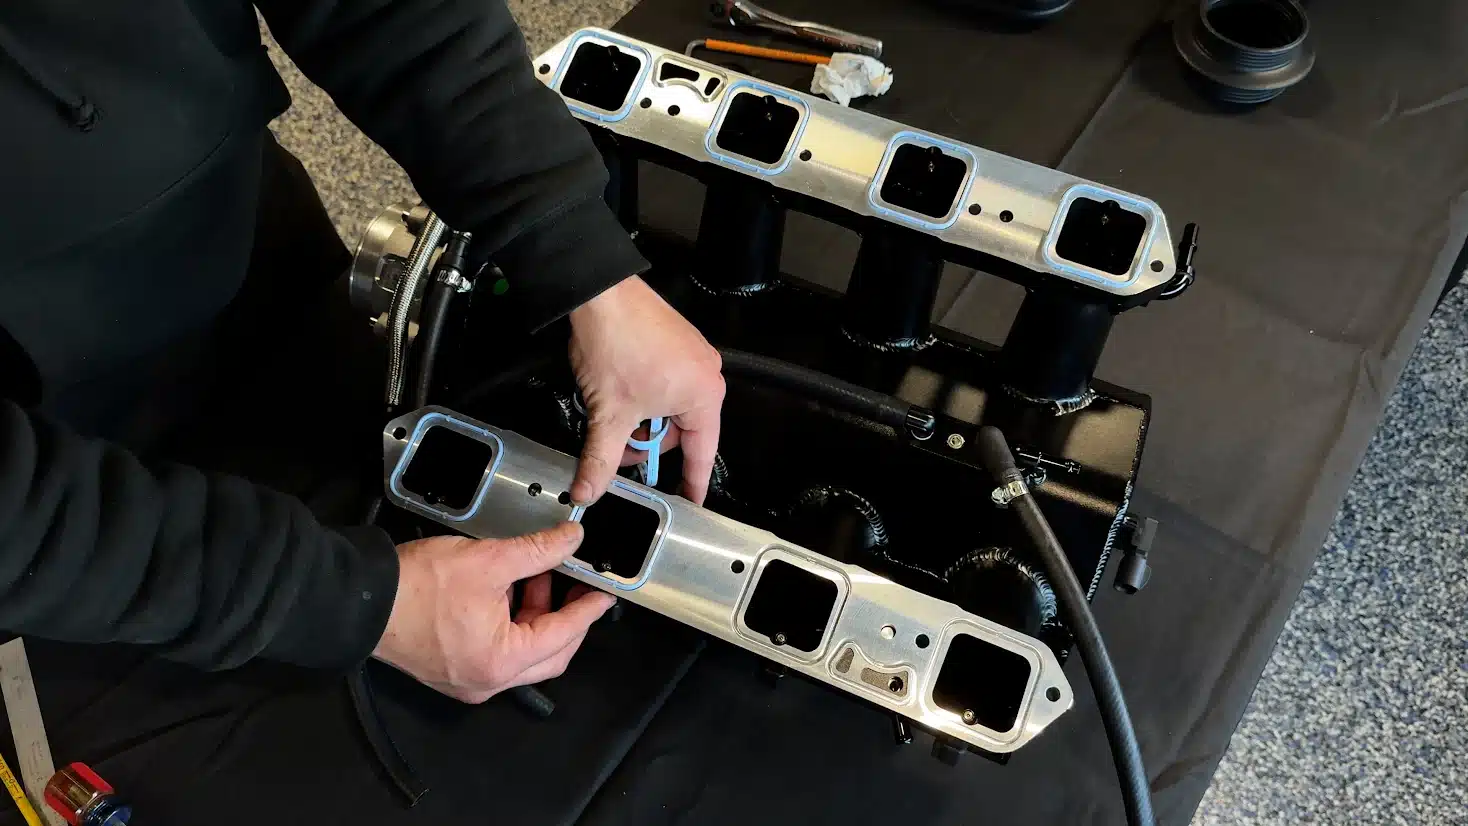
Aftermarket options, like the Blueprint intake manifold, are designed to improve airflow at higher RPM. They allow the engine to move more air more efficiently, which can lead to increased horsepower, but with trade-offs.
This is where many people get it wrong. If you install a high-flow intake manifold on an otherwise stock engine, you can actually lose low-end torque. That’s why we highly recommend only upgrading to an intake manifold like the Blueprint when paired with a camshaft upgrade. The cam allows the engine to take advantage of the increased airflow, preventing that loss in drivability down low.
Preparation and Accessing the Intake System
Before starting your performance intake install, the engine should be completely cool and the battery disconnected. You’ll be working around sensors, fuel rails, and critical sealing surfaces, so attention to detail matters.
Fuel rails and injectors may need to be carefully moved or removed, depending on the setup. Taking your time here prevents damage and ensures everything goes back together cleanly.
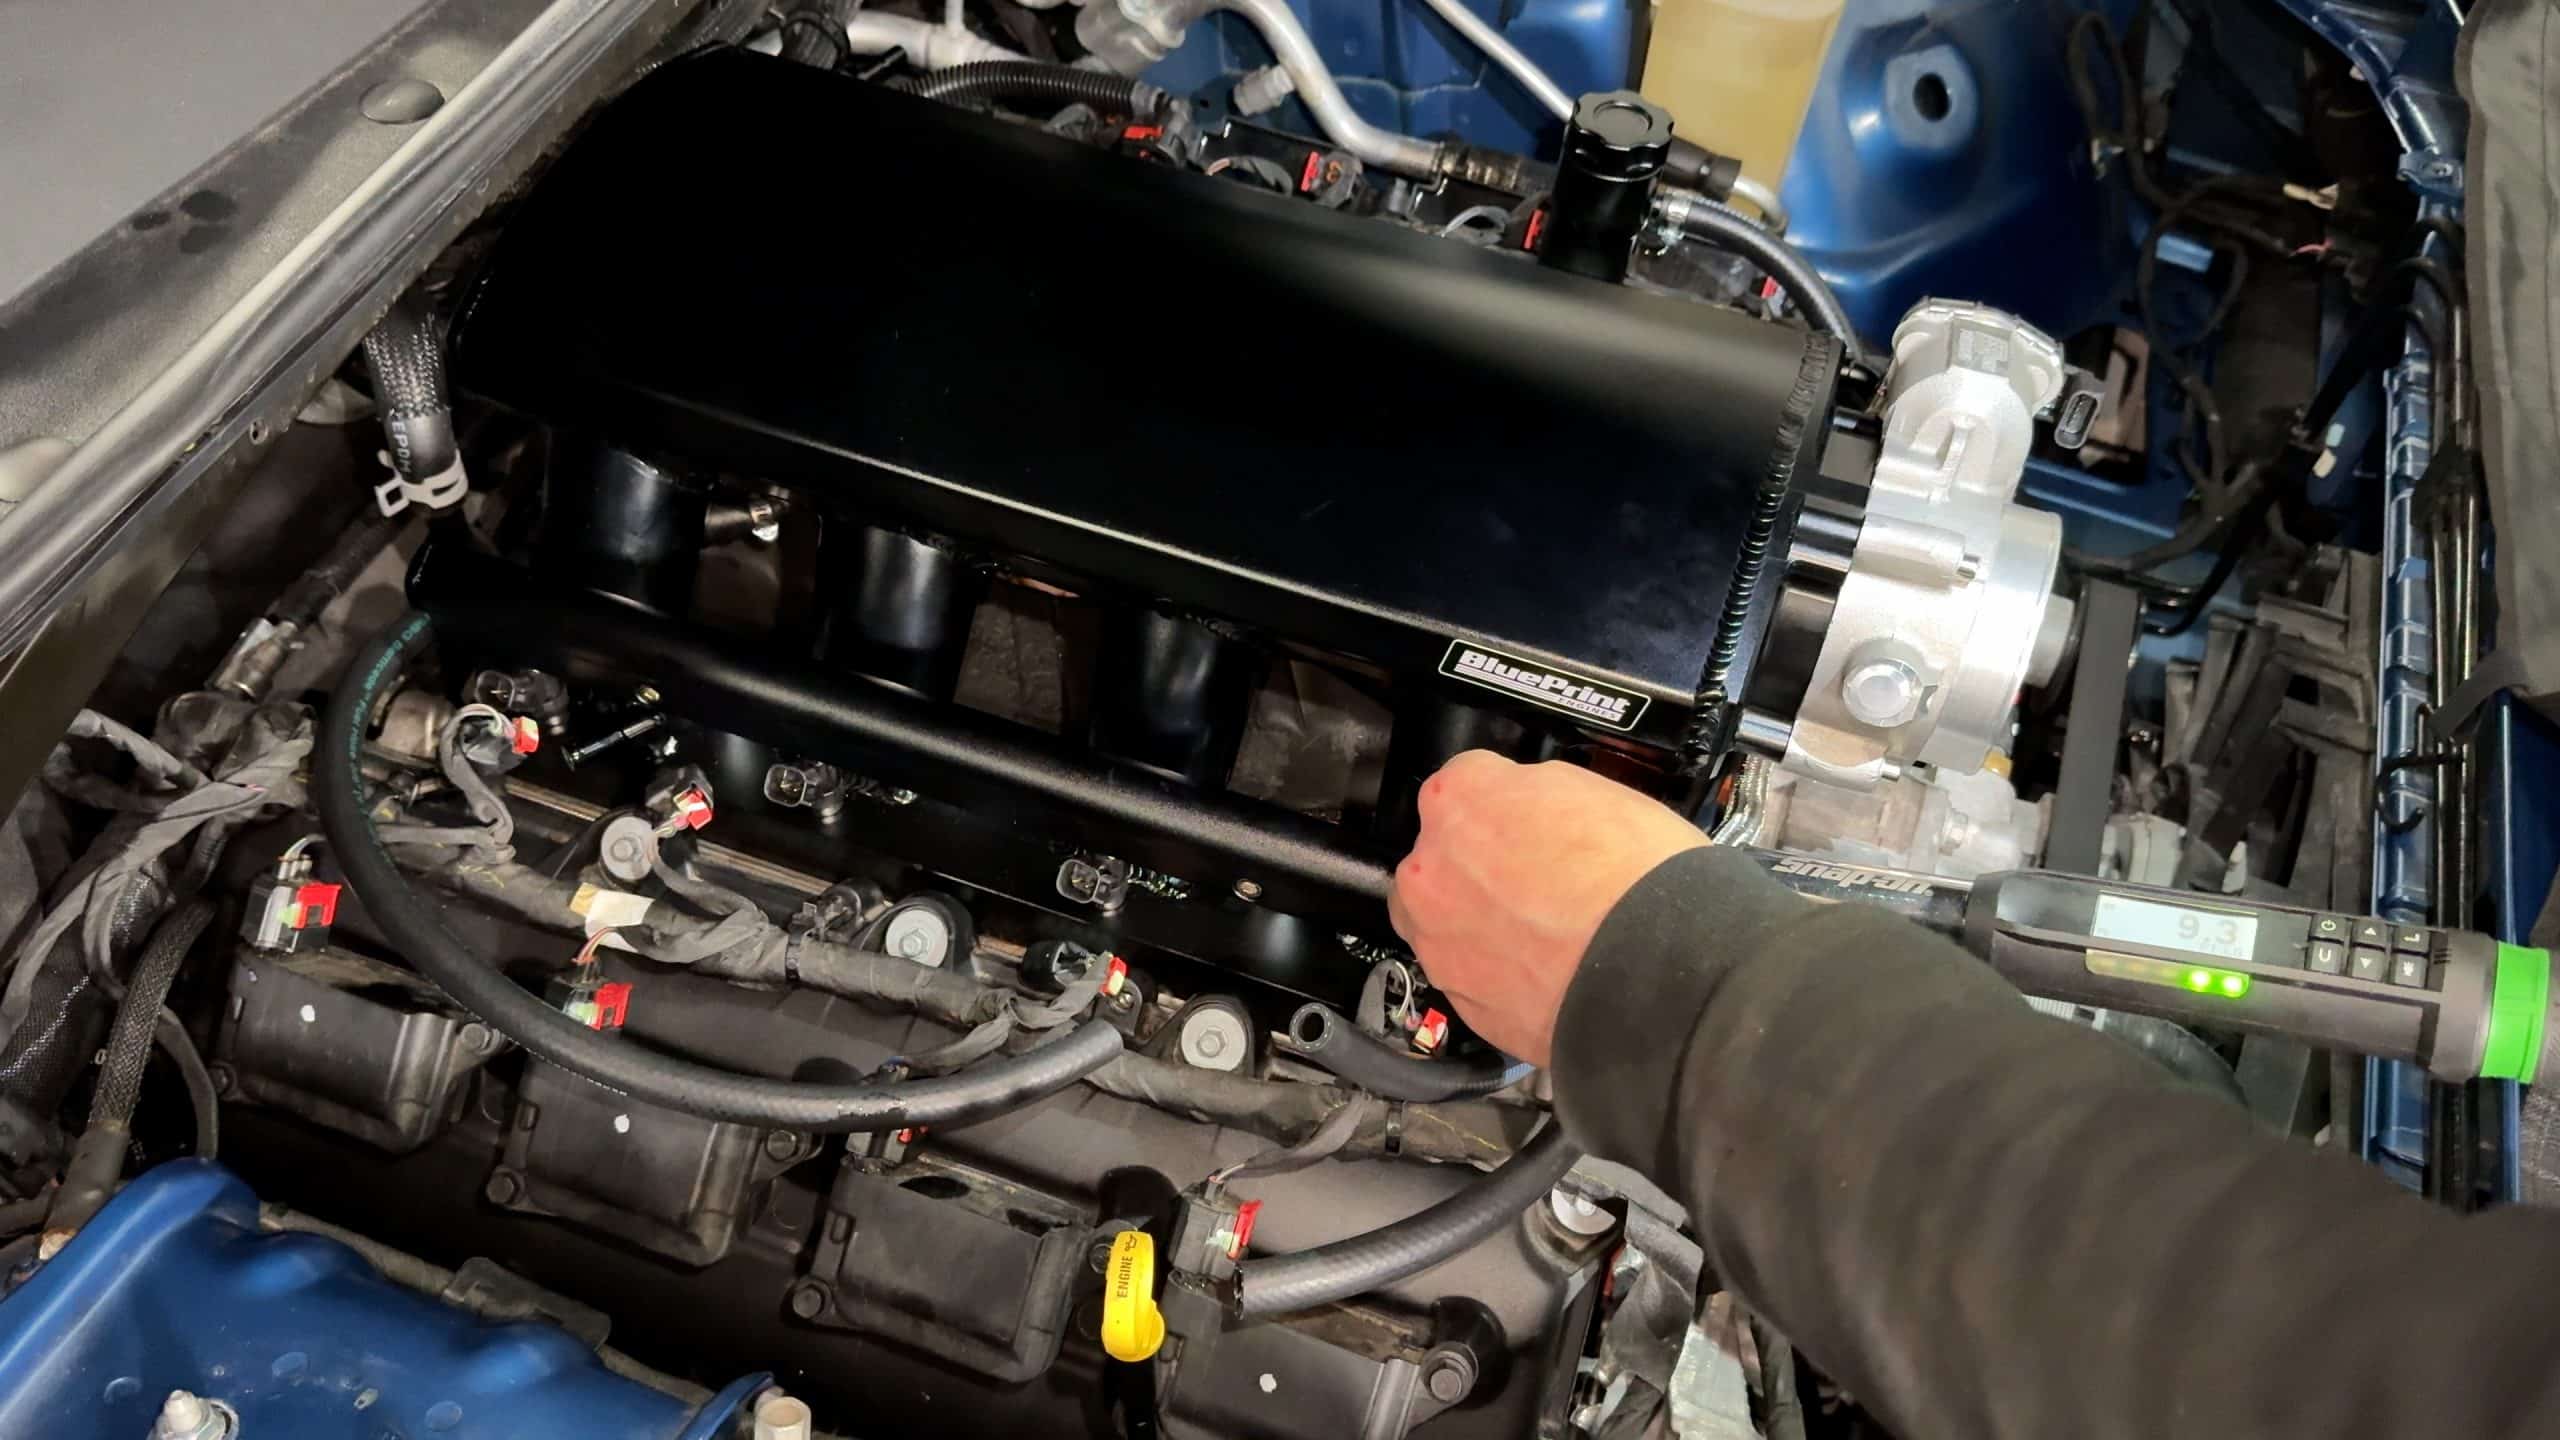
Removing the Factory Intake Manifold
The factory manifold is secured by a series of bolts that follow a specific pattern. These should be loosened gradually to avoid warping or uneven stress.
Once unbolted, the manifold can be lifted off, exposing the intake ports on the cylinder heads. This is where cleanliness becomes critical. Any debris entering the ports can cause serious engine damage. (If you have some new clean microfibers to stuff in the holes to make sure nothing falls in)
The mating surface should be inspected and cleaned thoroughly before installing the new manifold. Old gasket material or residue can prevent proper sealing and lead to vacuum leaks.
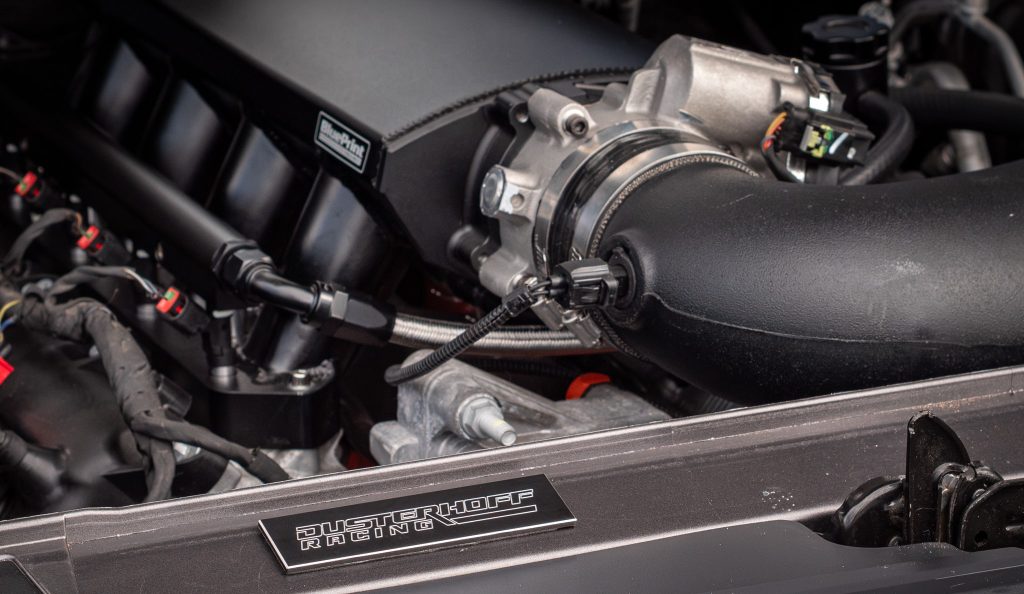
Installing the New Intake Manifold
With the surface prepped, the new manifold can be positioned. Proper gasket placement is essential here. Some setups use integrated seals, while others require separate gaskets; either way, alignment must be exact.
The manifold should be lowered evenly into place without shifting the gaskets. Once seated, bolts are installed and tightened in a specific sequence to ensure even pressure across the surface.
Torque matters here. Over-tightening can warp the manifold, while under-tightening can lead to leaks. Following the correct torque spec and sequence ensures a proper seal and long-term reliability.
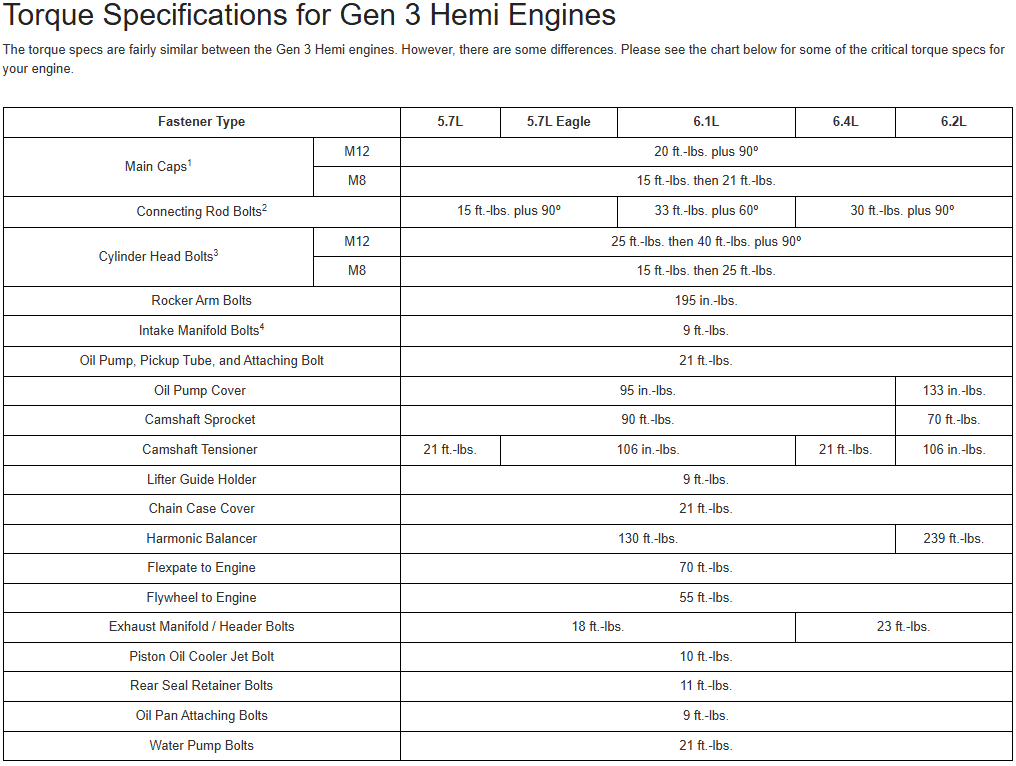
Bolt Torque Sequence and Sealing
One of the most important parts of any manifold upgrade step is tightening the bolts in the correct order. This ensures even clamping force across the intake and prevents air leaks.
The tightening process should be done gradually in multiple passes, following a center-out pattern. This allows the manifold to settle evenly onto the engine.
This step is critical for preventing vacuum leaks, which can cause rough idle, poor performance, and engine codes.
Reassembly and Final Connections
Once the manifold is secured, the rest of the system can be reassembled. This includes reconnecting:
- Throttle body
- Intake tubing
- Sensors and wiring
- Fuel system components (if removed)
Every connection should be double-checked before starting the engine. Even a small missed connection can cause drivability issues.
First Startup and Checking for Vacuum Leaks
After installation, start the engine and let it idle. This is where you confirm everything is sealed correctly.
Listen closely for hissing sounds, which can indicate a vacuum leak. The engine should idle smoothly without fluctuation. If it runs rough or throws a check engine light, recheck all connections and sealing surfaces.
Vacuum leaks are one of the most common issues with intake installs, and they almost always come down to improper sealing or uneven torque.
Where the Airflow Gains Come From
An intake manifold upgrade is all about improving how air is distributed into the engine. On a 6.4L HEMI, a performance manifold allows for better airflow at higher RPM, which can increase horsepower when the engine is set up to support it.
However, airflow upgrades only work when the rest of the system can keep up. Without a camshaft upgrade to increase valve lift and duration, the engine may not fully utilize the added airflow, leading to reduced efficiency at lower RPM.
That’s why this modification works best as part of a complete airflow strategy, not as a standalone upgrade.
Final Thoughts
A properly executed intake manifold install guide goes beyond just bolting parts together. It requires attention to sealing, torque sequence, and overall airflow balance.
On a 6.4L Gen 3 HEMI, this upgrade can unlock real performance gains, but only when matched with the right combination of supporting mods, especially a camshaft.
Need Help With Installation?
If you’d rather skip the hassle, we’ve got you covered. Here at Dusterhoff Racing, we offer in-house installations for Gen 3 HEMI vehicles.
Whether it’s headers, intake manifold, supercharger, etc. our team handles it and ensures everything aligns, seals properly, and performs exactly as it should.